Replacing Front Door Window Glass A Complete Guide
Replace front door window glass – Replacing front door window glass is a common home improvement task. This guide covers everything from choosing the right glass type to safely installing the new pane. We’ll explore different glass options, essential tools and materials, preparation steps, the installation procedure, troubleshooting, cost estimation, and, crucially, safety precautions.
Understanding the various types of glass, like tempered, laminated, or safety glass, is key. Each has its pros and cons regarding strength, security, and budget. Proper preparation, including accurate measurements and careful cleaning, is essential for a successful and lasting installation.
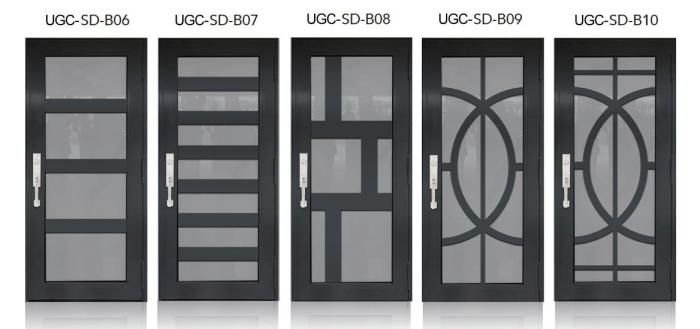
Types of Front Door Window Glass
Source: thespruce.com
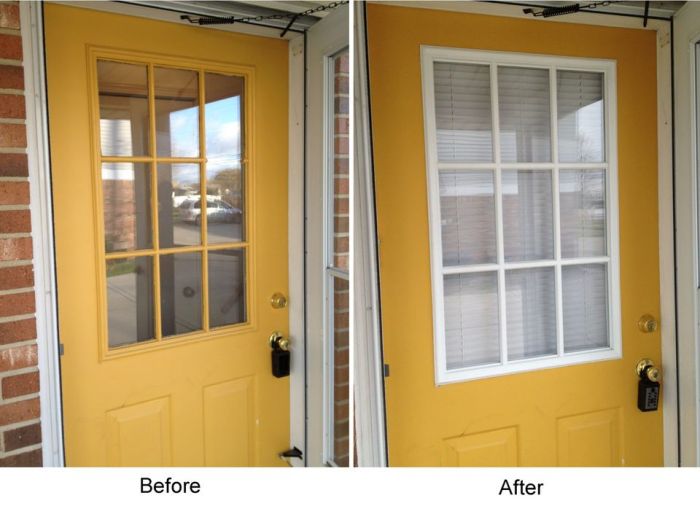
Replacing a front door window glass is a crucial step in maintaining both security and aesthetic appeal. Choosing the right glass type is vital for optimal performance. Different types of glass offer varying levels of strength, security, and cost, making informed selection essential.
Selecting the appropriate glass type depends on several factors, including the specific needs of your home, your budget, and the level of security you require. Understanding the characteristics of different glass types is key to making the right decision for your needs.
Tempered Glass, Replace front door window glass.
Tempered glass, also known as safety glass, is a type of glass that’s been strengthened by controlled heating and cooling. This process significantly increases its strength and toughness compared to annealed glass. If broken, it shatters into small, relatively harmless pieces, reducing the risk of injury.
| Glass Type | Description | Pros | Cons | Applications |
|---|---|---|---|---|
| Tempered Glass | Glass is strengthened by controlled heating and cooling. | High strength, safety, relatively low cost | Can be more fragile than laminated glass when subjected to localized stress, and may break if impacted in a specific manner. | Residential and commercial door windows, where safety is a primary concern |
Laminated Glass
Laminated glass is made by bonding two or more layers of glass together with a layer of interlayer material, usually a strong plastic film. This construction makes it extremely resistant to breakage. If broken, the layers remain bonded, preventing the glass from shattering into sharp fragments.
| Glass Type | Description | Pros | Cons | Applications |
|---|---|---|---|---|
| Laminated Glass | Multiple layers of glass bonded together with a strong interlayer. | High security, impact resistance, excellent soundproofing | More expensive than tempered or annealed glass, can be more prone to damage if the interlayer is compromised | Areas requiring enhanced security, such as bank branches or locations prone to vandalism |
Safety Glass
Safety glass is a broad term encompassing both tempered and laminated glass. It’s specifically designed to enhance safety by preventing dangerous splintering or breakage. The choice between tempered and laminated safety glass depends on the specific requirements of the application.
| Glass Type | Description | Pros | Cons | Applications |
|---|---|---|---|---|
| Safety Glass | A general term encompassing tempered and laminated glass designed for safety. | High safety, varies depending on the type. | Cost varies, tempered is generally less expensive, laminated is more expensive | Residential and commercial door windows, high-security applications |
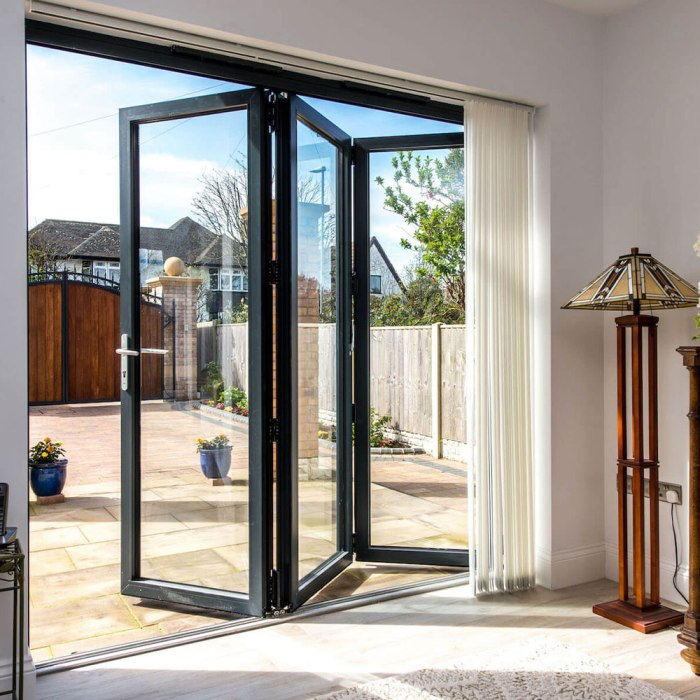
Tools and Materials Needed
Source: ctfassets.net
Replacing a front door window involves more than just swapping out the glass. You need the right tools and materials to do the job safely and effectively. Proper preparation and the right tools can save you time and frustration, and more importantly, prevent potential injuries. Knowing the costs of different options will also help you budget for the project.
Getting the right materials and tools is crucial. Choosing high-quality tools, for example, a good quality glass cutter, can prevent breakage and make the entire process easier. Knowing the cost of various materials helps in budgeting and avoiding unnecessary expenses. Safety precautions are essential to protect yourself and your property. A well-planned approach, from selecting the right tools to understanding safety protocols, makes the process smoother and more secure.
Essential Tools
The right tools make all the difference in a smooth and safe window replacement. Having the correct tools and understanding how to use them properly is essential for preventing accidents. Some tools are more important than others, depending on the complexity of the project. Examples include glass cutters, pry bars, and safety glasses.
- Glass Cutters: Essential for scoring the glass to break it along a straight line. Different types exist, from basic to more advanced, with varying prices. Look for a durable, well-balanced cutter. A good glass cutter can prevent accidents and ensure a clean cut, while a poor-quality one may result in shattered glass or an uneven break. Investing in a good quality cutter is a wise decision.
- Pry Bars: Used to carefully remove the old window frame and glazing. Different sizes and materials (e.g., metal, plastic) exist, each with varying costs. A good pry bar will have a comfortable grip and won’t slip, minimizing risk and strain.
- Safety Glasses: Protecting your eyes is paramount. Safety glasses prevent flying debris and fragments from causing eye injuries. These are a critical safety measure and should always be worn when working with glass.
- Gloves: Protecting your hands from cuts and sharp edges is vital. Using work gloves can prevent cuts and reduce the risk of handling injuries. Look for gloves that offer a secure grip.
Essential Materials
Selecting the right materials ensures a professional and durable replacement. Careful consideration of the materials used in the replacement is crucial to the project’s success. Different materials have varying costs and durability.
- New Glass Panes: The replacement glass should match the existing window in size and type (e.g., tempered glass for added safety). Pricing varies depending on the size, type, and brand. A quality glass pane ensures the window’s functionality and security.
- Sealant: A good quality sealant ensures a watertight seal. Different types of sealant exist, each with varying costs and properties. Using the right sealant is crucial for preventing drafts and water damage. The type of sealant used will depend on the climate and the desired level of water resistance.
- Caulk: For filling gaps and ensuring a watertight seal. Different types of caulk are available, each with a varying cost and usage. Caulk can be used to cover gaps or to add additional weather protection.
Cost Comparison
The cost of tools and materials can vary significantly. Factors include brand, quality, and features. A good estimate is necessary to budget effectively. Using a more expensive tool may result in a quicker, safer job, potentially saving time and money in the long run. Consider the long-term benefits of investing in high-quality materials.
| Item | Description | Estimated Cost (USD) | Safety Guidelines |
|---|---|---|---|
| Glass Cutter | For scoring the glass | $15-$50 | Use with caution, handle sharp edges carefully |
| Pry Bar | For removing the old window frame | $10-$30 | Wear gloves and eye protection; use appropriate leverage |
| Safety Glasses | Eye protection | $5-$20 | Essential for preventing eye injuries |
| New Glass Pane | Replacement glass | $20-$100+ (depending on size and type) | Handle carefully; avoid dropping |
| Sealant | For sealing the window | $5-$20 | Follow the manufacturer’s instructions |
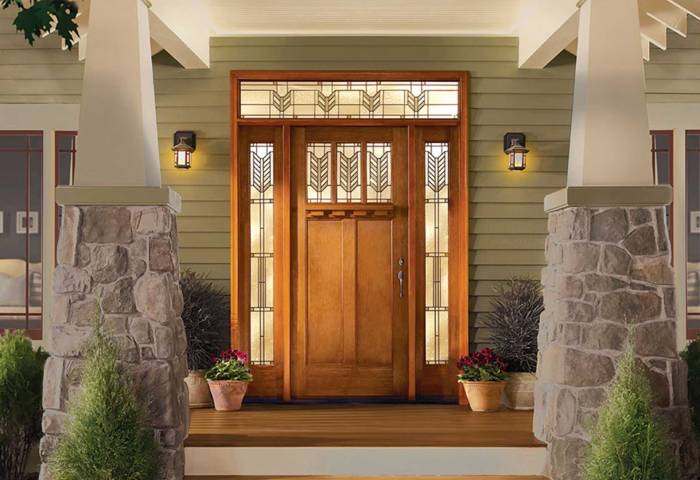
Preparation Steps
Source: thespruce.com
Getting ready for a new front door window is crucial for a smooth and successful replacement. Proper preparation minimizes mistakes and ensures a perfect fit and lasting installation. This section illustrates the key steps, from removing the old glass to preparing the frame for the new one. Accurate measurements and meticulous cleaning are paramount for a strong and aesthetically pleasing final product.
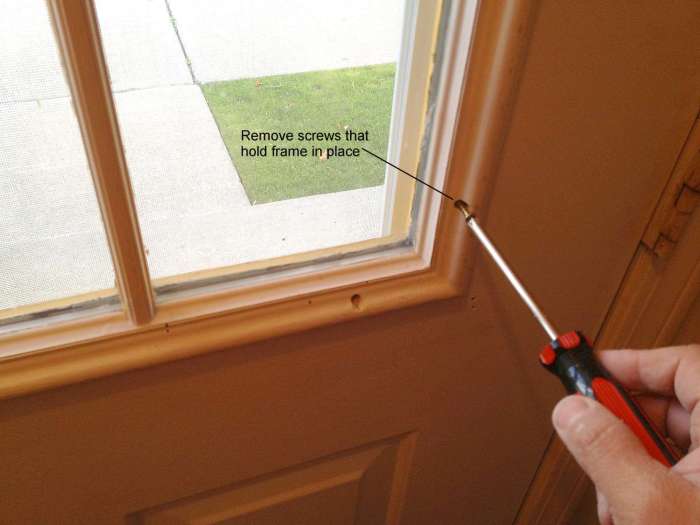
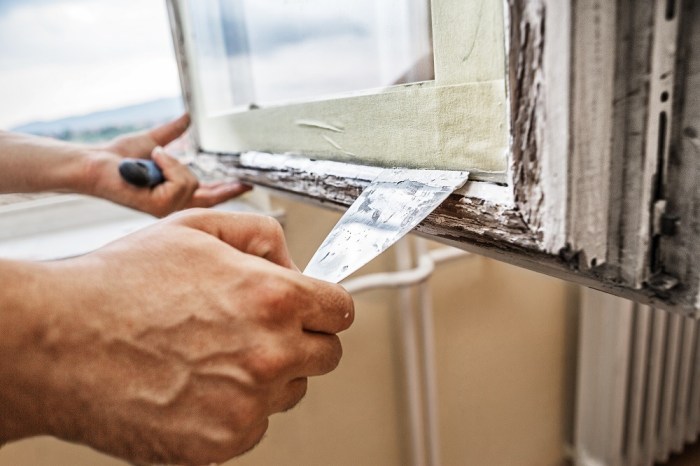
Removing the Old Glass
Before you can install new glass, you need to carefully remove the old one. This involves using the right tools to avoid damaging the frame. Improper removal can lead to cracks or warping in the frame, requiring additional repairs.
- First, protect the surrounding area with drop cloths or newspaper. This prevents debris from scattering and damaging nearby surfaces.
- Using a utility knife, carefully score the perimeter of the old glass. Avoid storing the frame itself. Then, using a pry bar or a similar tool, gently lift and remove the glass.
- If the glass is stuck or adhered to the frame, consider using a glass-removal tool or a glass-safe adhesive remover. Be cautious when using these tools to avoid causing further damage.
Preparing the Frame
A clean and properly prepared frame is essential for a secure and long-lasting installation. This step ensures the new glass fits snugly and adheres correctly.
- Thoroughly clean the frame using a mixture of mild detergent and water, removing any debris, old sealant, or residue from the previous installation.
- Use a scraper or putty knife to remove any remaining old sealant or glazing compound from the frame’s grooves. A wire brush can help in stubborn cases.
- Inspect the frame for any cracks, gaps, or damage. Repair any damage with wood filler or a suitable repair compound. Allow the filler to dry completely according to the manufacturer’s instructions.
Accurate Measurements
Precise measurements are vital for a perfect fit. Incorrect measurements lead to wasted materials and a poorly installed window. Use a measuring tape and a pencil to ensure accuracy.
- Measure the window opening’s width and height with extreme precision. Take multiple measurements from different points to ensure consistency.
- Record these measurements carefully. Using a measuring tape and a pencil, measure the window opening’s width and height with precision, taking several measurements from various points to confirm consistency.
- Consult the manufacturer’s specifications for the new glass to ensure the dimensions are compatible. This helps avoid potential issues with the new glass not fitting correctly.
Cleaning the Frame
A clean frame guarantees a strong bond between the new glass and the frame. This involves removing any debris or residue.
- Thoroughly clean the frame using a mixture of mild detergent and water. Ensure the area is completely rinsed.
- Dry the frame thoroughly using a clean cloth or paper towel. This prevents water spots and ensures a clean surface for the new sealant.
- Inspect the frame for any remaining debris or residue. Repeat the cleaning process as needed.
Ensuring a Secure Installation
A secure installation is crucial for the longevity of the replacement. A properly sealed window helps maintain the structural integrity of the door.
- Use the appropriate sealant and glazing compound for the type of glass and frame material.
- Follow the manufacturer’s instructions for applying sealant. This prevents leaks and ensures a long-lasting seal.
- Ensure the new glass is fitted correctly and securely within the frame. Double-check for proper alignment before applying sealant.
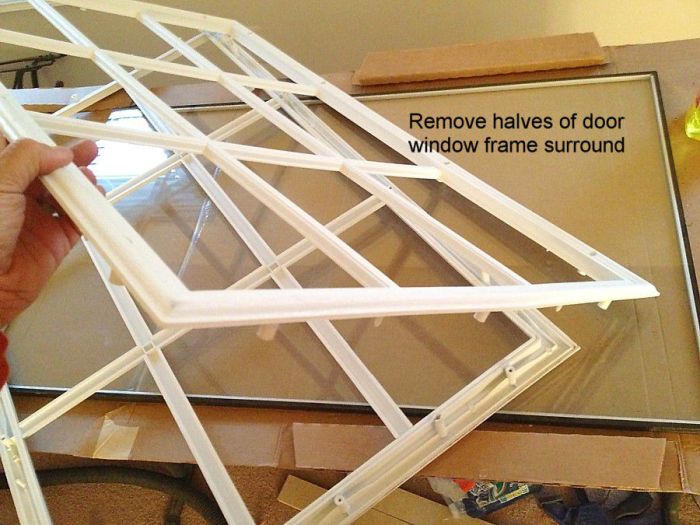
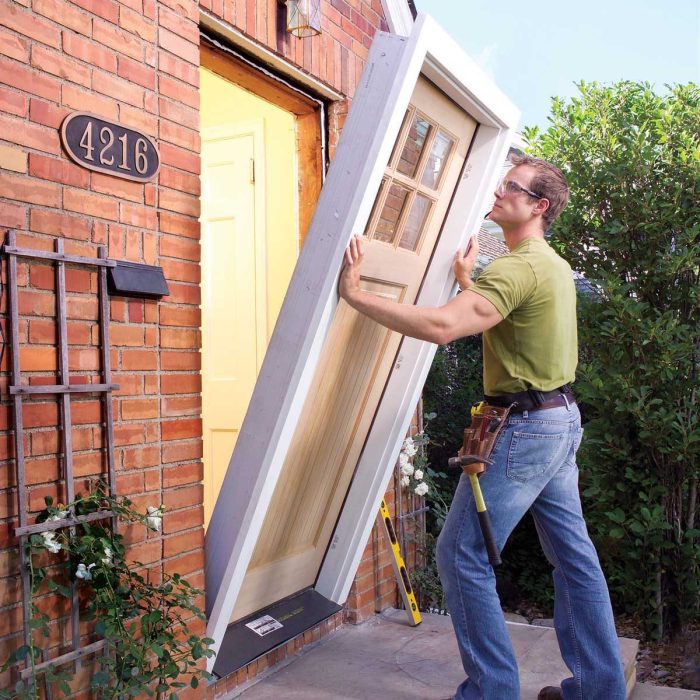
Replacing the Glass Pane
Source: kevinshandymanservices.com
Installing the new glass pane is a critical step in the process. Proper handling and installation are essential to ensure a tight seal, preventing drafts and water leaks. Carefully following the steps will lead to a long-lasting and secure repair.
Careful handling and precise installation of the new glass pane are crucial for a successful and lasting repair. This section illustrates the steps involved in safely installing the glass and creating a leak-proof seal. Attention to detail is key to avoiding costly issues in the future.
Handling the New Glass Pane
The new glass pane should be handled with care to prevent scratches and damage. Use a soft cloth or a piece of cardboard to protect the glass’s surface from being scratched or chipped during handling. This will ensure the pane’s appearance remains flawless. Avoid placing the glass directly on a hard surface. Always use appropriate supports to protect the glass during transport and installation.
Installing the Glass Pane
Before inserting the glass, ensure the frame is clean and dry. Any debris or residue can interfere with the sealant’s adhesion and potentially lead to leaks. Carefully position the new glass pane into the frame. Ensure the glass sits flush against the frame, without any gaps or spaces.
Securing the Glass with Sealant
A good quality sealant is vital for creating a watertight seal around the glass pane. A flexible, weatherproof sealant specifically designed for window glass is recommended. Apply a bead of sealant along the frame’s edges, where the glass will rest. The sealant should be evenly distributed and should completely fill any gaps between the glass and the frame. Avoid over-applying the sealant; a thin, consistent layer is sufficient.
Proper Sealant Application
Proper sealant application is paramount for preventing leaks and drafts. The sealant acts as a barrier against moisture, keeping the interior dry and comfortable. Over-application can lead to issues like excess sealant squeezing out, which may look unsightly and also create a risk of the sealant failing to adhere properly. A consistent, even layer ensures a complete seal and a long-lasting repair.
Installing the Glass: Step-by-Step
| Step | Action | Safety Precautions |
|---|---|---|
| 1 | Clean and dry the frame thoroughly. | Wear safety glasses to protect your eyes from debris. |
| 2 | Position the new glass pane in the frame. | Ensure the glass is properly aligned and flush with the frame. Use a helper to support the glass if necessary. |
| 3 | Apply a bead of sealant along the frame’s edges. | Use a sealant gun for precise application. Avoid touching the sealant with your bare hands to avoid contamination. |
| 4 | Press the glass firmly against the frame, ensuring the sealant is fully distributed. | Use a putty knife or a similar tool to ensure the sealant is spread evenly. |
| 5 | Wipe off any excess sealant. | Use a damp cloth to clean away any excess sealant. |
| 6 | Allow the sealant to cure completely. | Follow the sealant manufacturer’s instructions for curing time. |
Finishing Touches

Source: wikihow.com
Now that the new glass is in place, it’s time to make sure everything looks and functions perfectly. This final stage involves meticulous cleanup, thorough inspection, and ensuring a weather-tight seal. A careful approach here will guarantee a long-lasting, trouble-free repair.
Proper finishing touches prevent future issues, ensuring the longevity and efficiency of your front door. Addressing every detail now will save you headaches and potential replacements down the road.
Final Cleanup and Inspection
A thorough cleanup is crucial to avoid any lingering debris that could affect the new glass or frame. Removing all traces of construction materials and ensuring the area is spotless is key. Inspect the entire installation, looking for any gaps, imperfections, or signs of damage.
- Sweep or vacuum the surrounding area to remove any loose debris or construction dust.
- Wipe down the frame and the glass with a clean, damp cloth, paying particular attention to the edges and corners.
- Inspect the glass for any cracks, chips, or unevenness. Any issues should be noted and addressed immediately.
- Check the frame for any damage or gaps around the glass. Ensure the frame is secure and stable.
- Verify the glass is flush against the frame, without any noticeable gaps or misalignments.
Ensuring a Weather-Tight Seal
A well-sealed window is essential for energy efficiency and preventing drafts. Proper sealing around the new glass pane will minimize energy loss and keep out unwanted elements. This involves carefully applying caulk or weatherstripping to the edges of the glass and frame.
- Apply a bead of quality exterior caulk along the edges of the frame where the glass meets it. Use a caulking gun for even application.
- Ensure the caulk is smooth and continuous, without gaps or air pockets.
- If using weatherstripping, carefully install it along the frame to create a barrier against drafts and moisture. Make sure the weatherstripping is securely in place and provides a tight seal.
- Allow the caulk to cure completely according to the manufacturer’s instructions. This ensures the caulk adheres properly and forms a strong, lasting seal.
Quality Checks Checklist
This checklist Artikels the final steps and critical checks for a flawless front door window replacement.
| Task | Description | Quality Check |
|---|---|---|
| Cleanup | Remove all debris and dust. | Inspect for any residue or dust. |
| Glass Inspection | Verify glass for imperfections. | Check for cracks, chips, or unevenness. |
| Frame Inspection | Assess the frame for damage or gaps. | Confirm frame is secure and without gaps. |
| Seal Application | Apply caulk or weatherstripping. | Ensure a continuous, smooth seal with no gaps or air pockets. |
| Final Inspection | Overall assessment of the installation. | Confirm everything is flush, secure, and weather-tight. |
Troubleshooting Common Issues
Source: thespruce.com
Replacing a front door window can be a satisfying DIY project, but sometimes things don’t go exactly as planned. Knowing how to troubleshoot common problems will help you avoid frustration and ensure a successful outcome. This section will guide you through identifying and resolving potential issues like misalignment, leaks, and uneven glass.
Troubleshooting is key to a smooth replacement. By understanding potential problems and their solutions, you can fix them effectively and avoid costly mistakes. Each problem is addressed with practical steps and examples to help you confidently tackle any challenges that may arise.
Misaligned Glass
Incorrect placement of the new glass pane can lead to an unsightly gap or uneven fit. Carefully reviewing your installation steps is crucial. Precise measurements and proper handling of the new glass pane are essential to prevent misalignment.
- Double-check your measurements. A single millimeter error can create a noticeable gap. Use precise tools, like a digital caliper, for accurate measurements. Measure twice, cut once!
- Ensure the frame is clean and free of debris. Any foreign material can interfere with the glass’s proper fit.
- Align the glass carefully with the frame using a putty knife or a similar tool. Press gently to ensure it’s correctly positioned.
- If misalignment persists, carefully remove the glass and re-check your measurements. Re-measure the frame and glass to rule out any errors.
Leaks
Water seeping into your door frame after replacing the glass is a common issue. Identifying the source of the leak is crucial. Often, the problem lies in improper sealing.
- Inspect the sealant. A damaged or insufficient amount of sealant around the glass perimeter can allow water to penetrate. Replace any damaged or missing sealant. Use a high-quality, weather-resistant sealant.
- Check the frame for cracks or gaps. Even a small crack can allow water to seep in. Seal or repair any cracks or gaps with appropriate materials.
- Ensure the glass is correctly seated in the frame. Any gaps or imperfections in the fit can create a pathway for water to enter. Carefully examine the frame and glass edges for proper contact.
- Inspect the weatherstripping. A worn or damaged weatherstripping can create gaps. Replace worn weatherstripping for a complete seal.
Uneven Glass or Cracks
Imperfections in the glass pane itself can occur during installation. Careful handling and a steady hand during installation can minimize the risk of cracks or uneven glass.
- Inspect the glass for cracks or imperfections before installing. If cracks are present, replace the glass immediately.
- Handle the glass with care. Avoid dropping or striking the glass, which can lead to cracks or damage. Use soft, padded surfaces when moving or handling the glass.
- Check the glass for even pressure distribution against the frame. Uneven pressure can lead to warping or breakage. Ensure consistent pressure around the edges of the glass.
- Use the appropriate tools to address cracks or chips. Small cracks can sometimes be repaired with specialized epoxy, but severe damage often requires replacement.
Cost Estimation and Budgeting
Source: tqn.com
Replacing your front door window glass can be a straightforward DIY project or a professional service, each with varying costs. Understanding these costs upfront helps you make an informed decision. Whether you tackle it yourself or hire a pro, a clear budget is key to a smooth and successful replacement.
Material Costs
The cost of glass is a significant factor. Different types of glass (tempered, laminated, etc.) have varying prices. For example, a standard single-pane window glass might cost around $20-$50, while laminated glass for added security could be $50-$100. Consider factors like the size and shape of the window when calculating the glass cost. Don’t forget the cost of any necessary sealant or glazing materials.
Labor Costs
Hiring a professional for glass replacement involves labor costs. These costs depend on several factors, including the complexity of the job, the location, and the demand for the service. A simple replacement might cost $50-$150, while more complex replacements, involving specialized glass types or window frame repairs, can cost $200-$500 or more.
Additional Expenses
Beyond materials and labor, there might be additional expenses. For example, if your window frame needs minor repairs, or if you need to purchase specialized tools, these costs should be factored into your budget. Also, consider the cost of any required permits if your local regulations necessitate them.
DIY vs. Professional Replacement
The choice between DIY and professional replacement depends on your skill level, available time, and the complexity of the job. DIY replacements can save money on labor costs, but if you lack experience, you could end up with a poor-quality result that might require further repair or replacement. A professional replacement ensures a high-quality outcome and often comes with warranties.
Pricing Models for Glass Replacement Services
Different pricing models exist for glass replacement services. Some companies charge a flat rate per window, while others charge based on the size or type of glass. It’s wise to ask for a detailed breakdown of costs before committing to any service.
Cost Estimation Table
| Cost Category | Estimated Range (USD) | Notes |
|---|---|---|
| Glass Material | $20 – $100+ | Depends on type and size |
| Labor (Professional) | $50 – $500+ | Based on complexity and location |
| Additional Expenses (e.g., repairs) | $0 – $100+ | Variable depending on the need |
| Total Estimated Cost (DIY) | $20 – $150+ | If you are a skilled DIYer |
| Total Estimated Cost (Professional) | $70 – $600+ | Based on complexity and labor rates |
Safety Precautions
Source: completewindowcare.com
Replacing a front door window glass, while generally a DIY-friendly project, requires careful attention to safety. Ignoring safety measures can lead to injuries, so prioritizing these steps is paramount. Following these precautions ensures a smooth and injury-free replacement process.
Proper safety precautions are crucial throughout the entire glass replacement procedure, from removing the old glass to installing the new one. A proactive approach to safety minimizes risks and protects both you and your home.
Importance of Safety Measures
Safety is paramount in any home improvement project, especially when dealing with sharp edges and potentially hazardous materials. Accidents can lead to significant injuries or property damage, and preventive measures save you from costly mishaps. By taking the necessary safety precautions, you can ensure a safe and efficient replacement process.
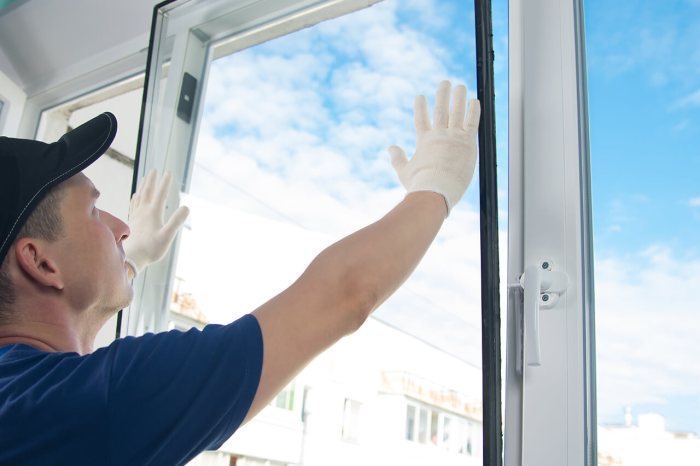
Safety Equipment Required
The essential safety gear includes safety glasses, gloves, and sturdy work boots. Safety glasses protect your eyes from flying debris, and gloves shield your hands from sharp edges and potential cuts. Sturdy work boots provide ankle support and protection from falling or slipping hazards. Consider using a face shield for additional protection against flying particles.
Handling Glass Safely
Glass is fragile and can easily shatter, especially when broken. Proper handling during removal and installation is crucial to avoid injury. Use protective gloves and eyewear. When removing the old glass, support the glass with a towel or soft cloth to avoid dropping or shattering it. During installation, handle the new glass carefully, avoiding contact with sharp edges or corners. Secure the new glass using appropriate tools and techniques.
Safety Considerations for Each Step
A step-by-step approach to safety ensures each part of the process is risk-free. The specific safety precautions will vary depending on the step.
- Removing the Old Glass: Wear safety glasses, gloves, and a face shield to protect yourself from flying glass shards. Use appropriate tools, such as a pry bar, to carefully remove the old glass. Support the glass with a soft cloth to avoid dropping it.
- Preparing the Frame: Inspect the frame for any sharp edges or protruding nails. Use sandpaper or a file to smooth any rough edges to avoid cuts. Wear gloves to protect your hands from splinters.
- Installing the New Glass: Handle the new glass carefully, using appropriate tools and techniques to avoid breakage. Ensure the new glass fits snugly and securely into the frame. Use caution when tightening screws or fasteners to avoid over-tightening or damage to the frame.
- Cleaning Up: Wear gloves and safety glasses when cleaning up broken glass and debris. Use a broom and dustpan to collect the broken glass and dispose of it properly. Dispose of broken glass in a sealed container to avoid potential hazards.
Closing Notes: Replace Front Door Window Glass
Source: familyhandyman.com
In conclusion, replacing your front door window glass is a manageable project with the right information. This guide provides a comprehensive overview, from selecting the right glass to finalizing the installation. By following the steps Artikeld, you can ensure a safe, secure, and aesthetically pleasing result. Remember to prioritize safety throughout the process. Don’t hesitate to consult professionals if needed. Your new window should be a testament to your DIY skills and the improved security of your home.